GitHub
If you start working on a project with someone, you will need to share your git repository with him, so you can both benefit from the collaboration and share the changes.
This is where a company GitHub (or others like gitlab or bitbucket) comes in. GitHub is designed as a Git repository hosting service with many additional features. It’s basically an online database that allows you to keep track of and share your Git version control projects outside of your local computer/server. It has a free and paid tier, but the free tier is very much sufficient for 99% of the users. Additionally GitHub serves as a kind of programmer social networking platform featuring
- heated discussions over steering of open-source projects
- bug tracking via Issues
- forking of repositories (making your own copy of existing repository)
- opening and merging of Pull Requests to allow random bygoes from the internet jungle improve or extend your code
- Adding informative Changelogs as a place to inform users of your software about breaking changes
Using GitHub
To create a new repository on GitHub, you need to create an account. In case you do not have one yet, go to https://github.com/signup. The email you use for creating an account does not have to match the one you used in the configuring git step as your local git email.
After registering and confirming your email, log in and go to the GitHub home page.
Create a repository
And now we are READY to create our first GitHub repository:
You can find the “New repository” option under the “+” sign next to your profile picture, in the top right corner of the navbar.
After clicking the button, GitHub will ask you to name your repository and provide a brief description. You do not need to add .gitignore or README file yet. Keep the repository empty.
Afterwards depending on you situation GitHub will provide you with detailed instructions how to proceed.
Create a new repository from scratch on your command line
echo "# new-repository" >> README.md
git init
git add README.md
git commit -m "first commit"
git branch -M main
git remote add origin https://github.com/<your-github-username>/<your-github-repository>.git
git push -u origin main
Or push existing repository from the command line
if you already have created a few commits locally.
git remote add origin https://github.com/<your-github-username>/<your-github-repository>.git
git branch -M main
git push -u origin main
What happened now?
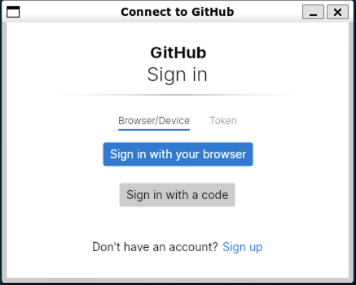
If you have done the configuration step, you should be prompted for the first time for a log in to the Git Credential Manager. Use the first option "Sign in with your browser" and one of two things should happen.
If you are currently logged in to github.com in your web browser, it should prompt you to authorize the Git Credential Manager to access GitHub. Simply allow the access and that should be it.
If you are not logged in in browser yet, it should open a new tab for you to log in and afterwards authorize Git Credential Manager.
Once successfully confirming your identity, the program will securely remember your login from now on and will allow you to push into your repository.
Working with GitHub
More detailed explanation of some of previous commands would be great. So let's delve into it. If you want to start working on a remote GitHub project where for example your friend or co-worker added you as a contributor, you need to download (clone) the copy of the git repository to your computer.
git clone <url.git> - downloads a remote repository to a local system into a folder named the same as the name of the repository. Will also create a copy of branches on remote called origin.
git push <origin> <branch> - puts all your local commits to remote repository branch on the remote called origin. (those which were not pushed yet)
You might be wondering what that origin word means in the command above. What happens is that when you clone a remote repository to your local machine, git creates an alias for you. In nearly all cases this one alias is called origin. It's essentially shorthand for the remote repository's URL. You can of course have multiple remotes for your repository, but only one can be named origin.
git pull - fetches all remote changes and merges them with local changes - this is what you should do before starting to work on a task to ensure that you have the newest version from your coleagues to avoid trouble with merging the features later. Is is essentially just a combination of git fetch and git merge operations.
In order to find out more about what git merge does, visit the follow-up branching chapter.
Please now ensure that you have managed to push your local git repository with a poem.txt you have made to GitHub before you continue with the lecture.
Until you push, most operations are safe. When other people are involved in the project, tread with extra caution with "dangerous operations" like rebasing and force pushing.
Git is an example where copying a random "smart answer" from stackoverflow without understanding the situation is not always a good idea - both when you work alone and even more when you collaborate with other people.
Have fun with Git and GitHub!
